
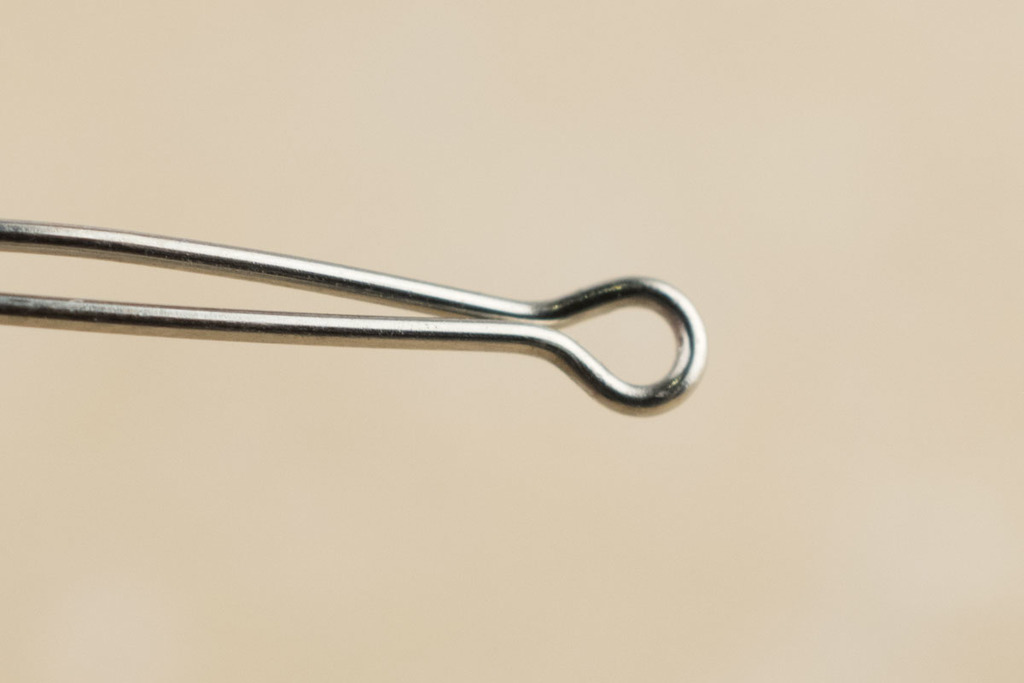
Step 1
When dealing with a small bead that has a wide beading hole, following the same principle of making the loop to the same of its size is often best to follow. Often the base of the loop wolud become a place where the bead would rest its edges.
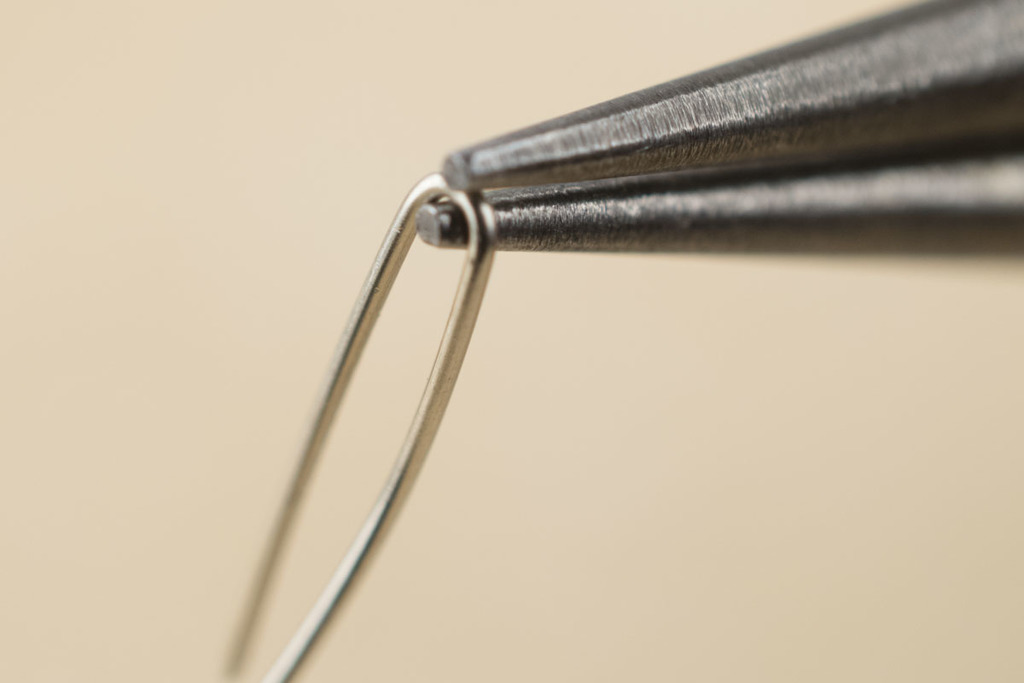
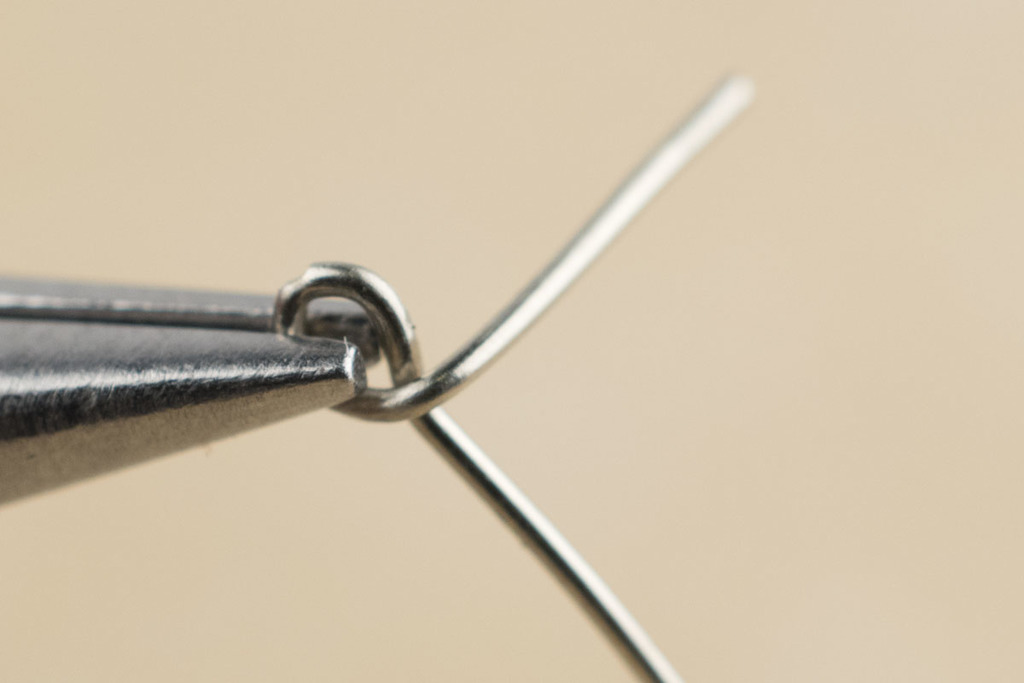
Step 2
Fold the wire, following the curve of the prongs of the round nose pliers. Make sure to put the wire closer to the inside of the pliers to fit the size necessary that matches the circumference of the beading hole.
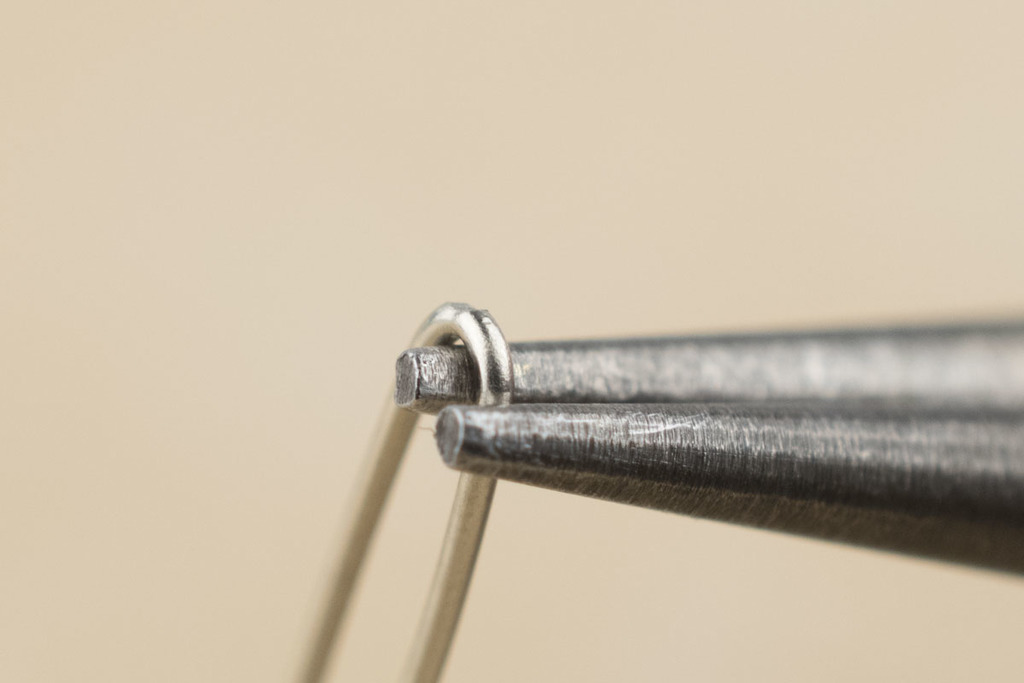
Step 3
Use the tips of the prongs of the round nose pliers to create the indentation that will mold and shape the size of the loop. The further in the wires are inside the prongs the larger the size of the loop.
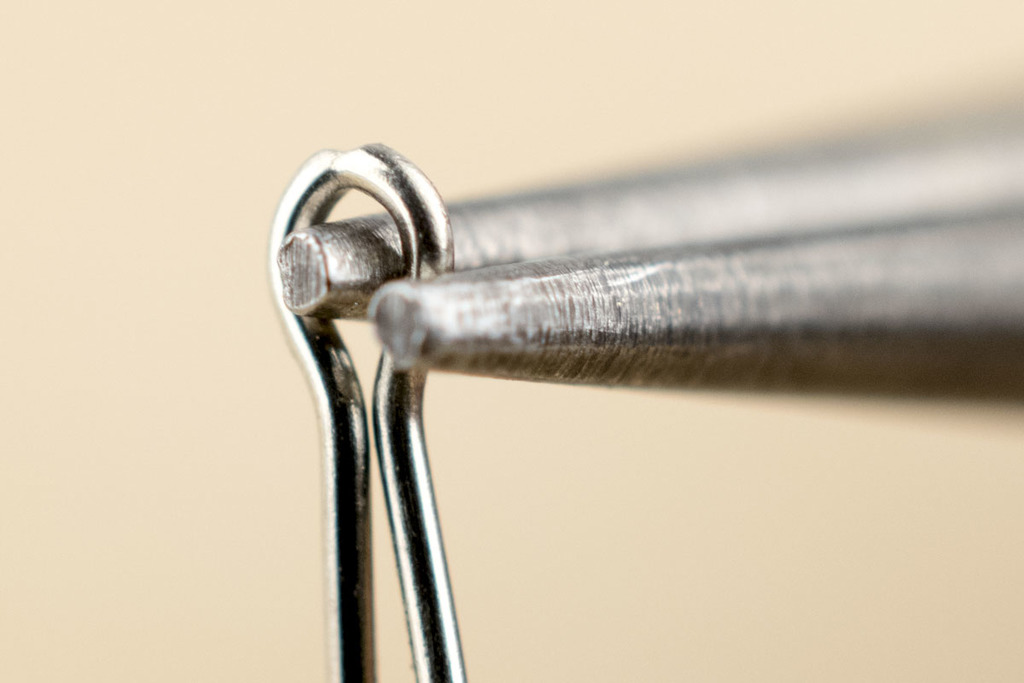
Step 4
For each side of the wire, slightly tilt the pliers, making a pulling movement, pushing it down towards the direction of the wires. Small beads with an wide opening would only hold its place only when the loop hole is big enough for it to look like its sitting on top of it.
Step 5
Hold on to the loop and put the shorter wire across the longer wire crossing each other making an "L-Shape".
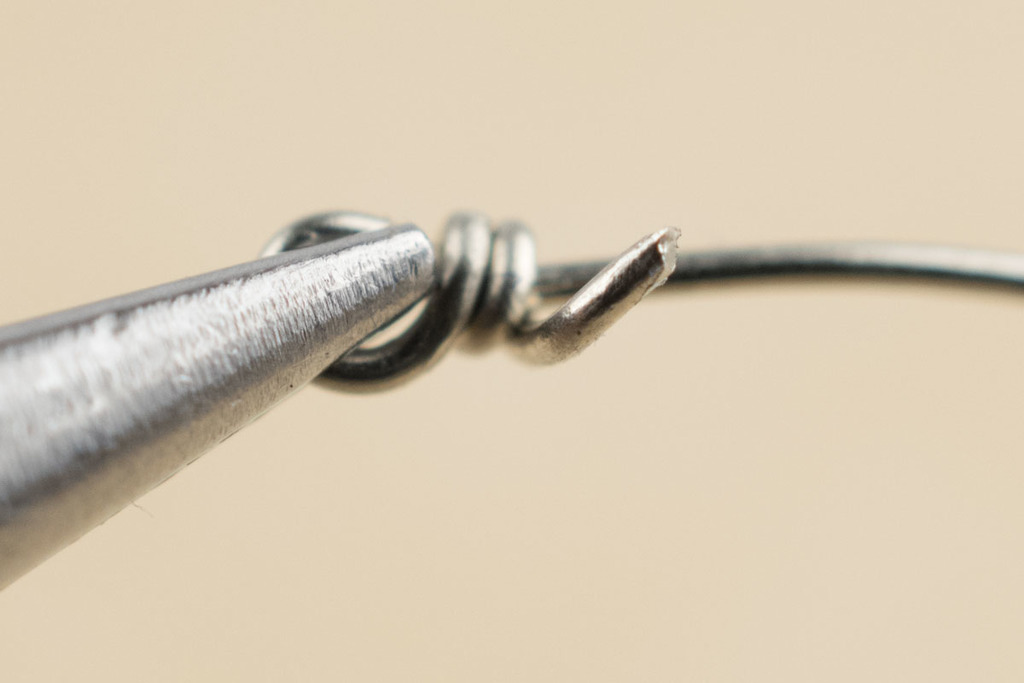
Step 6
From the L-Shape, wrap the shorter wire and wrap it around the longer portion of the wire, maintain the shape of the loop by holding one to the loop with a flat nose pliers. To determine the number of wraps necessary wrap the wire half way to the size of the bead. This will create a natural tension when you create the loop for the other side of the bead.

Step 7
After the number of wire wraps are established, cut excess wire, make sure you cut as close you can to the wire wraps you made.
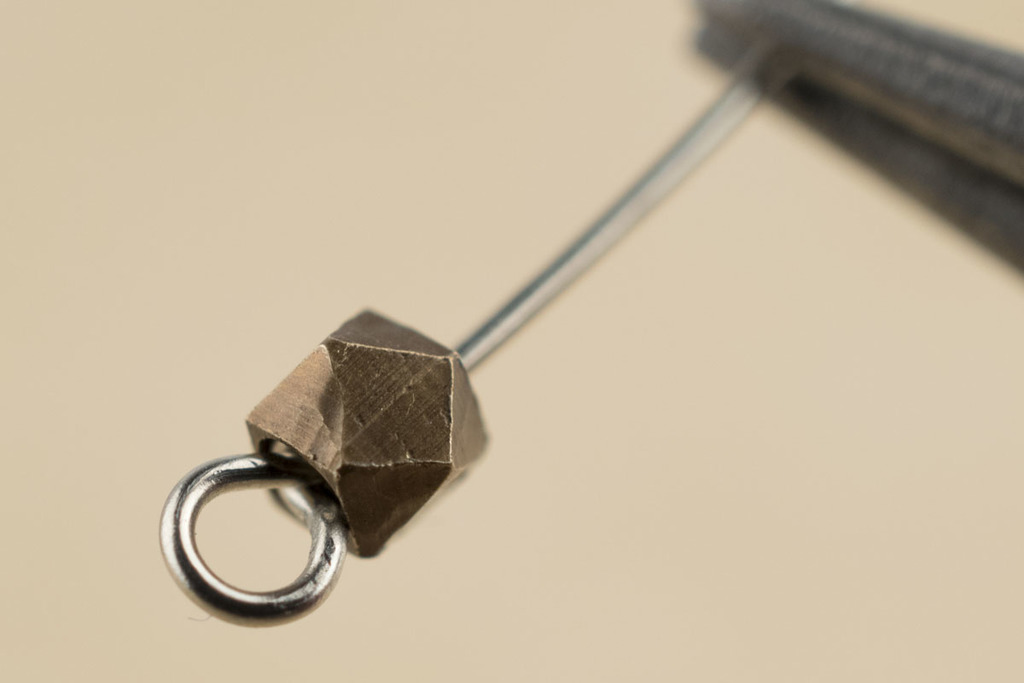
Step 8
Insert the bead you will use after cutting the extra wire. Since the size of the hole of the bead is enough for the wire wrap to pass through and hide the wire wrap, it is not necessary to flush the extra wire.

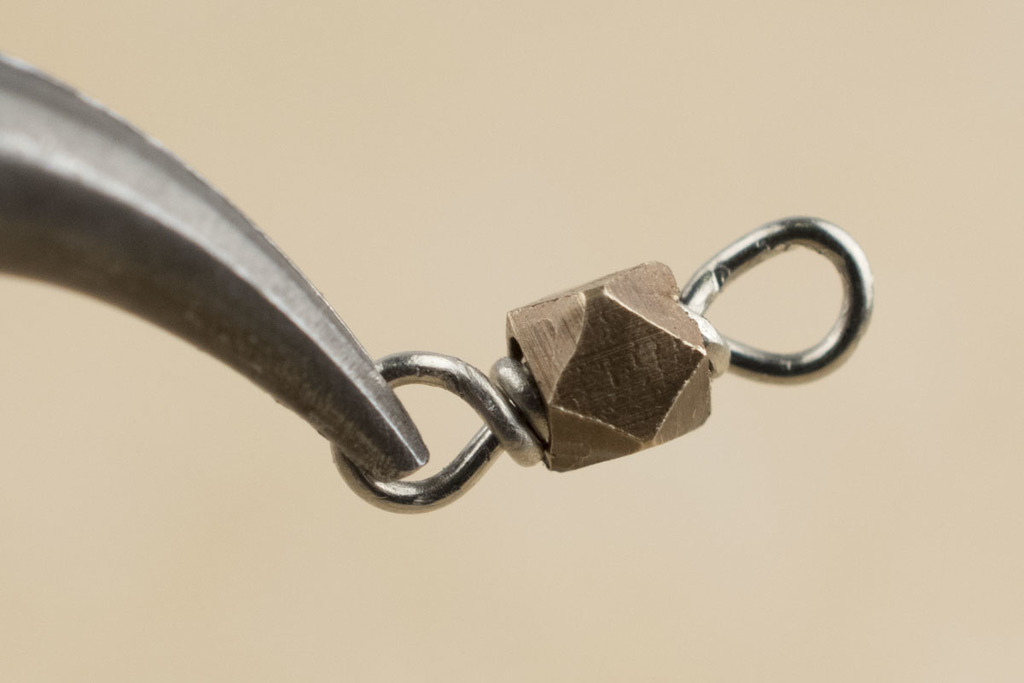
Step 9
Wrap the remainder of the wire onto one of the prong of the round nose pliers, and wrap the remainder of the wire around. Wrap this wire around as close as the amount of the wire wraps you created on the other side. Be sensitive to the pressure and tension of the wire and cut at the edge of the bead.
Step 10
She the metal beads you are working with us and show us the tricks you learned following this technique.
Conclusion
Small beads that have a large beading hole could be extremely complicated because of the small leverage of its handle space. Here is a proper way to work with these items that could be put into production.